
Do you have a camera and want to make the most of it? So, it’s time to discover manual mode! Many beginner photographers tend to be satisfied with the automatic modes of their camera, but by using the manual mode, you have full control over your camera’s settings. In this article, we will explain how to properly use the manual mode of your camera to obtain professional quality photos.
Understand the basic settings of manual mode
To properly use manual mode, it is essential to understand the three basic settings:
- the opening
- the shutter speed
- ISO sensitivity
The aperture controls the amount of light that enters the camera. A large aperture (small number f/) will provide a background blur, while a small aperture (large number f/) will give a greater depth of field.
The shutter speed determines the time during which the device’s sensor is exposed to light. A fast shutter speed will freeze the movement, while a slow shutter speed will capture the movement.
The ISO sensitivity controls the sensitivity of the sensor to light. A high ISO sensitivity is ideal for low-light situations, but it can cause noise in the image.
When to use manual mode?
Use of the flash
In order to freeze the moment and obtain a better result, manual mode is essential on a set-up with flashes. This makes it possible to adjust the synchronization speed to the maximum, to play on the ambient light outdoors in order to subtract it from that of the flashes while controlling the aperture.
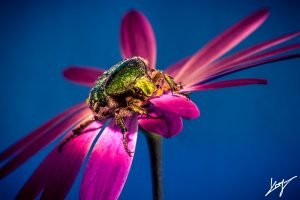
Get the most details in macro photography
In macro photography, a small movement of the insect or subject can cause the exposure to be adjusted if your device is in automatic mode. Manual mode is therefore preferable in this kind of photographs. Manual mode allows you to control the depth of field by playing on the aperture. You can also activate the stabilization of your objective (if the option exists). This will also allow you to increase the shutter speed in order to have maximum clarity while being sure to freeze the subject.
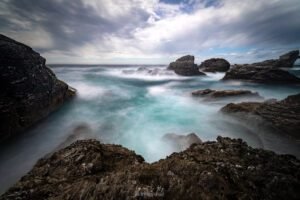
Work in a long pose
The long pose allows you to obtain an artistic result for your photos. Manual mode is therefore recommended to lengthen the shutter speed, or even to switch your box to “bulb” mode.
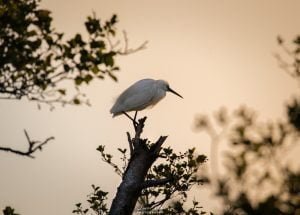
Animal photography
Animals are unpredictable, that’s why manual mode can help you freeze their movement.
Configure the settings in manual mode
To switch to manual mode, simply turn the mode selector on your camera until you reach the “M” symbol. Once in manual mode, you can start adjusting the settings according to your needs.
To adjust the aperture, turn the lens ring until you get the desired value. A small aperture (large number f/) is ideal for landscapes, while a large aperture (small number f/) is perfect for portraits.
To adjust the shutter speed, use the adjustment wheel on the top of your camera. A fast shutter speed (1/1000 sec) is recommended to freeze the movement, while a slow shutter speed (1/30 sec) will capture the movement.
As for ISO sensitivity, you can adjust it via your camera’s menu. Try to keep the ISO sensitivity as low as possible to avoid noise in your photos, unless you are in a low-light situation where a higher ISO sensitivity is required.
Experiment and adapt
Once you have understood the basics and configured the manual settings, it’s time to go out and take pictures! Don’t be afraid to experiment with different settings to see what works best in different situations.
If you are photographing a landscape, try using a small aperture (large number f/) to obtain great depth of field and sharpness throughout the stage. To capture movement, use a slower shutter speed and experiment with blur effects.
By practicing regularly and experimenting with manual settings, you will develop your own photographic style and get professional-quality photos.
Conclusion
The manual mode of your camera is a powerful tool that allows you to take full control of your settings. By understanding the basics of aperture, shutter speed and ISO sensitivity, correctly configuring the settings and experimenting, you will be able to capture professional-quality photos. So, do not hesitate to switch to manual mode and explore the creative possibilities it offers!
Bonus
Take a look at this video (thank you Empara), it can give you a little help to better understand the manual mode of your camera.
