Introduction
Do you dream of capturing photos worthy of a professional but you only have limited equipment? Don’t worry, you can always get incredible results with little equipment. In this article, we will give you tips and tricks to photograph like a pro.
Basic material
Choose between a compact camera and an interchangeable lens camera
The choice between a compact camera and an interchangeable lens camera depends on your personal preferences and photographic needs. Compact cameras are practical and easy to carry, while interchangeable lens cameras offer greater flexibility in terms of composition and image quality.
Which objective to choose
If you opt for an interchangeable lens camera, it is important to choose the right lens. A versatile lens with a varied focal range can be a good choice to start with. This will allow you to photograph different subjects, such as landscapes, portraits and close-ups, without having to change your lens frequently.
18-55mm on an APS-C case
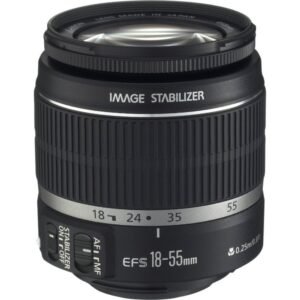
Users of APS-C boxes are faced with a magnification factor (1.4x/Nikon, 1.6x/Canon). This 18-55mm lens therefore corresponds to a 25-77mm lens on a Nikon case and 28-88mm Canon on a full-format case. prefer a model with an aperture of 2.8.
24-70mm on a full-format case
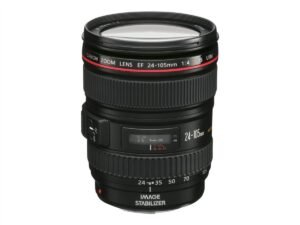
A standard and versatile lens for a full-format case, an F4 aperture model is with a very reasonable quality/price ratio. For those who have a little more budget, prefer a version at F2.8.
12-35mm on a 4/3 micro box
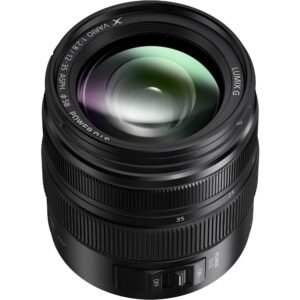
The boxes with a 4/3 sensor have a greater magnification factor. So the focal range will be smaller. A 12-35mm on this type of box is worth a 24-70mm on a full-format box.
Essential accessories
In addition to your camera and lens, some accessories can help you improve your shots:
Polarizing filter
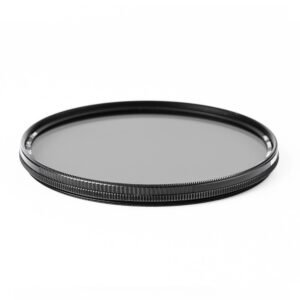
A polarizing filter can reduce reflections and improve colors in your photos, especially when shooting outdoors.
Mini tripod
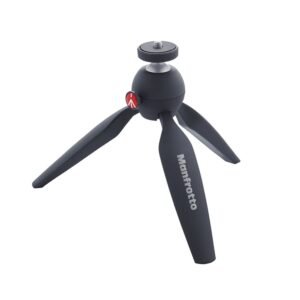
A mini tripod is convenient to stabilize your camera and avoid motion blurs, especially when shooting in low light or with slow shutter speeds.
Bag or camera bag
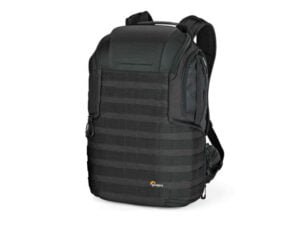
A bag or camera bag allows you to carry your equipment safely and have it on hand when you need it.
Use of HDR
Work in three steps
To obtain photos with a wide dynamic range, you can use the HDR (High Dynamic Range) technique. Here’s how to proceed:
The stabilizer and AEB
Use a tripod to stabilize your device and activate the AEB (Auto Exposure Bracketing) function to take several photos with different exposures. You can also use the lens stabilizer if it is equipped with it but disable it if your box is on a tripod.
Adjust your device
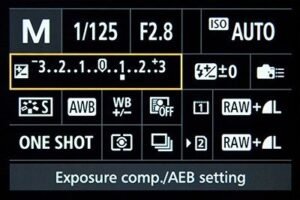
Menu in Canon manual mode
Set your device in manual mode and adjust parameters such as aperture, shutter speed and ISO sensitivity according to lighting conditions.
Modify the exposure
Take a series of photos with different exposures using the AEB function. Make sure to capture the details in the dark and bright areas of the scene.
Process your images in three steps
Once you have captured your images using the HDR technique, you can process them to obtain a balanced final result:
Merge your images
Use photo editing software to merge the different exposures and create an HDR image.
Process the image
Adjust the levels of brightness, contrast and color to obtain a final rendering that matches your artistic vision.
Localized settings
If necessary, make localized adjustments to improve certain details or correct specific imperfections.
Multiple exposure, use the exposure stack
Shoot for an exhibition stack
Exposure stacking is a technique that consists of combining several images with different exposures to obtain a final photo with a wide dynamic range:
Use the stabilizer
As with the HDR technique, use a tripod to stabilize your camera and avoid motion blur or lens stabilizer.
Select the drive mode
Select the drive mode of your device to take several photos quickly, with different exposures.
Device settings
Set your camera to manual mode and adjust the settings according to the lighting conditions and the scene you want to photograph.
Merge your exhibitions
Use photo editing software to merge the different exposures and create an image with a wide dynamic range.
Processing and synchronization
Adjust the brightness, contrast and color levels to achieve a balanced final rendering. Also make sure to synchronize the different elements of the photo for a harmonious result.
conversion
If you wish, you can convert your image to black and white to add an artistic touch.
Setting the stacking mode
If necessary, adjust the stacking mode to get the best result according to the scene you photographed.
Capture portraits
Work in natural light
To capture beautiful portraits, there is nothing like natural light:
Device settings
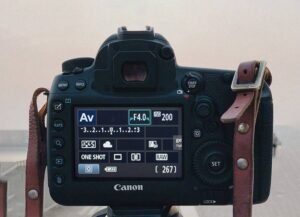
Opening priority mode
Set your device to aperture mode priority (Av mode) to control the depth of field and get an aesthetic background blur.
Focal length
Use an appropriate focal length for your subject. A longer focal length can help create a compression effect and focus on the subject.
Focal point
Be sure to focus on the eyes of your subject, as they are often considered the most important part of a portrait.
Material: ND filter
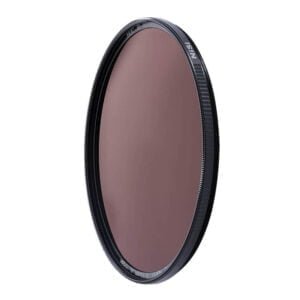
ND filter to be screwed on the lens
In case of overexposure or with too much light conditions, you can use an ND filter to block part of the light.
Flash deported in 3 steps
If you want to use a flash to illuminate your subject, here’s how to do it:
Installation of the flash
Use a remote flash to avoid hard shadows and get softer and more natural lighting.
Device settings
Set your device to manual mode and adjust parameters such as shutter speed, aperture and ISO sensitivity according to the ambient light.
Flash settings
Adjust the power of the flash and the diffusion angle to obtain a balanced and flattering lighting on your subject.
Expose the high lights
Comparison of techniques
Exposure of highlights can be a challenge, but here are some techniques you can use:
HDR function of the phone
If you use a phone with an HDR function, turn it on to capture an extended dynamic range in your photos.
Freehand HDR
If you do not have an HDR function on your device, you can always try the freehand HDR technique by taking several photos with different exposures and then merging them.
The high lights
Try to slightly overexpose your photos to avoid losing details in the highlights. You can then correct the exposure during image processing.
Shooting in 3 simple steps
Here’s how you can capture photos with balanced exposure, even in difficult lighting conditions:
Use the stabilizer
To avoid motion blurs, use a tripod or stabilize your device on a stable surface.
Device settings
Set your device to manual mode and adjust settings such as shutter speed, aperture and ISO sensitivity according to the scene.
Control the exposure
Use your device’s exposure compensation function to adjust the exposure according to the highlights of the stage.
Image processing in 3 simple steps
Once you have captured your photos, you can process them to obtain a balanced exposure:
Basic settings
Adjust brightness, contrast and color levels to achieve balanced exposure throughout the image.
Clarin the foreground
If necessary, clear the foreground to reveal details that could be lost due to lower exposure.
Darken the sky
If the sky is overexposed, darken it slightly to avoid losing details and getting a more natural rendering.
Conclusion
You don’t need expensive equipment to photograph like a pro. With the right techniques and a little practice, you can get incredible results with little equipment. Do not hesitate to experiment, familiarize yourself with your equipment and develop your own photographic style.
No post found.