• Welcome !
  • Portfolio
  • Blog
    • All articles
    • Photo techniques
    • Photo equipment
    • Photo retouching
    • To discover
  • OTHER
    • About me
    • Contact me
    • My references
  • Français
  • English
  • Welcome !
  • Portfolio
  • Blog
    • All articles
    • Photo techniques
    • Photo equipment
    • Photo retouching
    • To discover
  • OTHER
    • About me
    • Contact me
    • My references
  • Français
  • English

Studio set-up with flashes and color gelatins

Home » Photo techniques » Studio set-up with flashes and color gelatins
Studio set-up with flashes and color gelatins
  • Published on : 12/27/2023
  • At 9:19 PM
  • In : Photo techniques
  • Reading time : 3 minutes
  • Languages : fr | en |

Contents

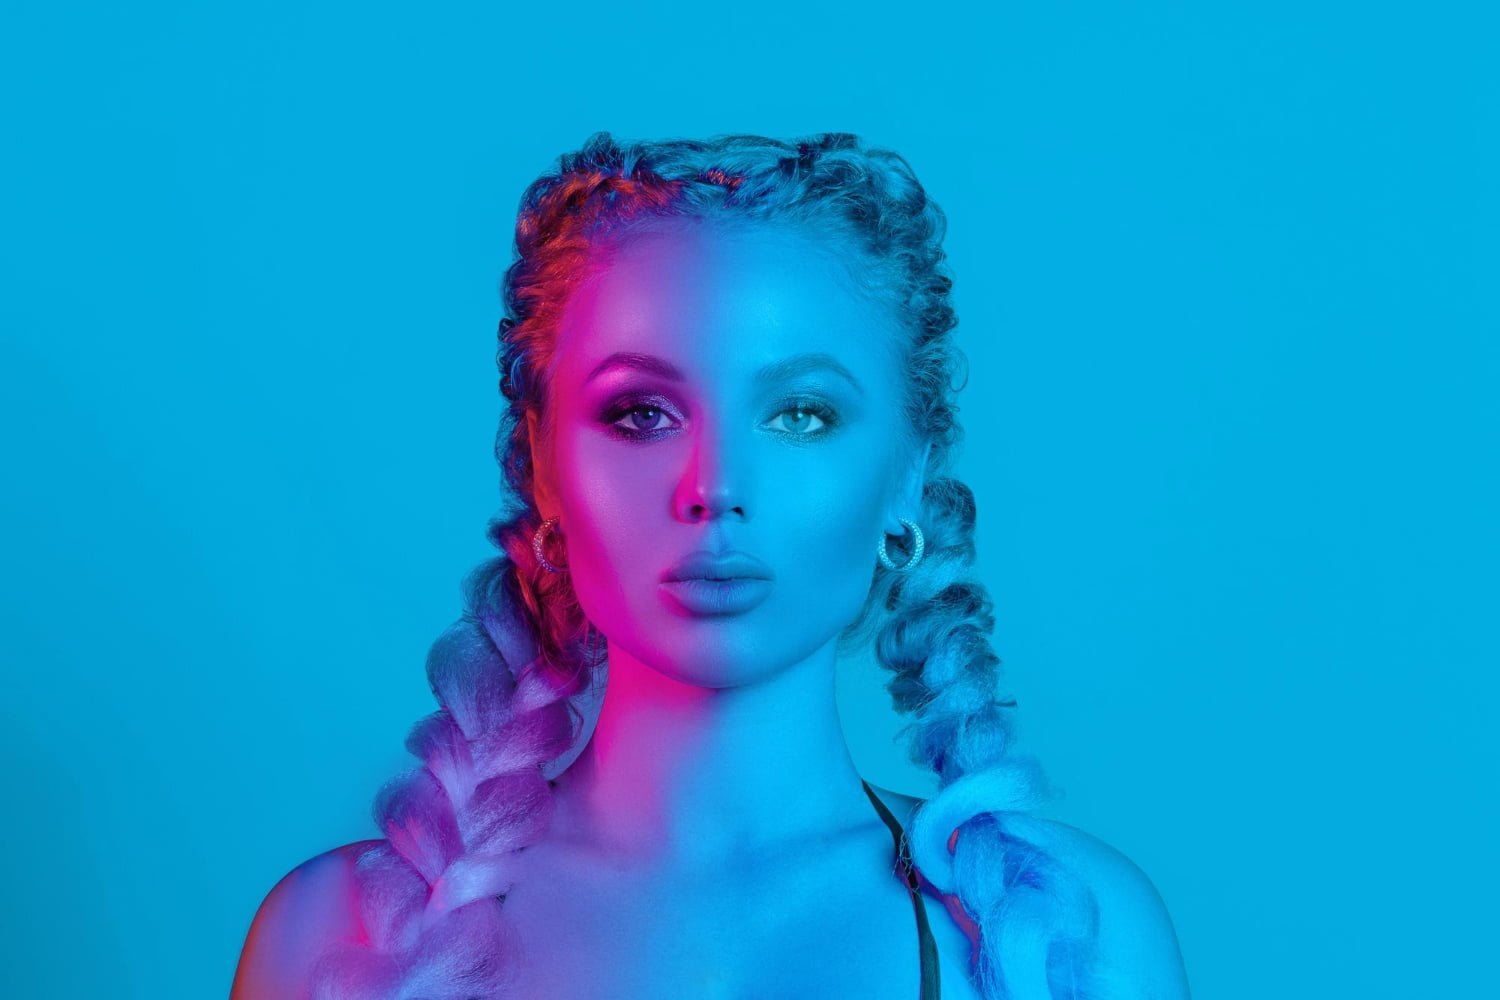
If you are passionate about photography, you probably already know that light is one of the most important elements to obtain great shots. And when you work in the studio, you have the possibility to fully control the light to create the perfect atmosphere. In this article, we will explain how to create several studio set-up with flashes and gelatins to give a creative touch to your photos.


Set of a single flash and colored gelatin

If you want to create a studio set-up with a single flash and a colored gelatin, here is a diagram that can guide you:

1. Place your flash at a 45-degree angle to your subject. This will make it possible to obtain side lighting and add dimension to your photos by shooting with “the edges of the box”.

2. Attach a colored gelatin to your flash to create interesting lighting effects. You can choose from a variety of colors to give a special atmosphere to your photos.

3. Use a reflector or diffusion panel to soften the light of the flash and avoid hard shadows on your subject.

4. Place your subject at an appropriate distance from the flash to get the desired exposure. You can adjust the power of the flash according to your needs.

5. Don’t forget to adjust the other settings of your camera, such as aperture, shutter speed and ISO sensitivity, to get the desired result.


Set of 2 colored flashes and gelatins

If you want to add a second flash to your studio set-up, here is a diagram that will show you how to do it:

1. Place your first flash at a 45-degree angle to your subject, as in the previous diagram.

2. Add a second flash to the back of your subject, positioning it slightly high. This will create a backlight effect and separate your subject from the background.

3. Attach color gelatins to both flashes to add visual interest to your photos. You can choose complementary or contrasting colors to get the desired effect.

4. Use reflectors or diffusion panels to soften the light of both flashes and avoid hard shadows.

5. Adjust the power of the two flashes according to your needs and the desired exposure.

6. Don’t forget to adjust the other settings of your camera to get the desired result.


Set of 3 colored flashes and gelatins

If you want even more creative possibilities, you can add a third flash to your studio set-up. Here’s how to proceed:

1. Place your first flash at a 45-degree angle to your subject, as in the previous diagrams.

2. Add a second flash to the back of your subject, by positioning it slightly in height.

3. Place your third flash in such a way as to illuminate the background of your scene. You can position it directly behind your subject or place it on each side to obtain more uniform lighting.

4. Attach colored gelatins to the three flashes to create even more interesting lighting effects. Experiment with different color combinations to get unique results.

5. Use reflectors or diffusion panels to soften the light of the three flashes and avoid hard shadows on your subject.

6. Adjust the power of the three flashes according to your needs and the desired exposure.

7. Don’t forget to adjust the other settings of your camera to get the desired result.


Set of 4 flashes and colored gelatins

For professional photographers or passionate amateurs, the use of four flashes in a studio set-up can offer even more creative possibilities. Here’s how to proceed:

1. Place your first flash at a 45-degree angle to your subject, as in the previous diagrams.

2. Add a second flash to the back of your subject, by positioning it slightly in height.

3. Place your third flash to illuminate the background of your scene, as in the previous diagram.

4. Add a fourth flash to illuminate a specific element of your scene, such as an accessory or an important detail.

5. Attach color gelatins to the four flashes to create unique and captivating lighting effects.

6. Use reflectors or diffusion panels to soften the light of the four flashes and avoid hard shadows.

7. Adjust the power of the four flashes according to your needs and the desired exposure.

8. Don’t forget to adjust the other settings of your camera to get the desired result.


By experimenting with different studio set-up schemes, flashes and color gelatins, you will be able to create unique and captivating photos. Do not hesitate to adjust the parameters according to your artistic vision and explore new ideas to get results that you like. Have fun and let your creativity run wild!
RELATED POSTS :

  • utilisation des gélatines en studio photo Using gelatins in studio photography
    Using gelatins in studio photography
  • focus stacking
    Focus stacking: What does it consist of and how to do it ?
Share this post :
Let us know your thoughts about this topic Cancel reply

Your email address will not be published. Required fields are marked *

PrevPreviousUsing gelatins in studio photography
AfterPhoto tripods, everything you need to knowNext

No more results...

Languages
Category
  • Photo material
  • Photo retouching
  • Photo techniques
  • To discover
Related posts
  • Using gelatins in studio photography
  • Focus stacking: What does it consist of and how to do it ?
Retrouvez-moi sur Insta

chooks_two

PHOTOGRAPHE AMATEUR【〇】🇫🇷
• Landscapes | Urbex | Macro | Portrait(1%)
• Laurent Le Ny
• Facebook : Laurent Le Ny - Photographie
• Suis-moi et like 😉

Une jolie chouette effraie 🦉 ou « dame blanch Une jolie chouette effraie 🦉 ou « dame blanche ». Son vol est le plus silencieux 🔇 de tous les oiseaux de la planète 🌍.———————————🔻——————————
Prise réalisée avec :
- Canon R5 📷 🔴 @canonfrance
- Objectif Sigma 150-600mm Sport @sigmaphoto
- Mes yeux 👀 et mon âme d’artiste 🎨
———————————🔺——————————#naturephotography #boissieredudore #wildlifephotography #zoolaboissieredudoré #animalier #loireatlantiquetourisme
Ce n’est pas par où vous commencez, mais la hau Ce n’est pas par où vous commencez, mais la hauteur que vous visez qui compte pour réussir. (Nelson Mandela 🧑🏾‍🦳)ℹ️ Ouverture F13 / ISO 100 / 25sec
———————————🔻——————————
Photo réalisée avec :
- Canon R5 📷 🔴 @canonfrance
- Trépied Benro travel Angel @benrofrance
- Objectif Irix 15mm Blackstone @irixlens
- Porte filtre et filtre polarisant Irix @irixlens
- Filtre ND et GND Benro @benro_filters
- Mes yeux 👀 et mon âme d’artiste 🎨
———————————🔺——————————#landscape #landscapephotography #dslrphotography #beautifullandscape #longexposure #longexposure_shots #seascape #amazingshot #photographiepaysage #explorebretagne
« L’éternité ♾️ c’est la mer ⚓️ mêlée au soleil ☀️»
(Arthur Rimbaud 👨).
📍 Pointe de Beg-An-Aud sur la presqu’île de Quiberon.
📷 Shoot en pose longue de 25 sec ⏳————————————————————
Faite avec :
- Mon cœur ❤️ & mon regard
- Canon R5 / @canonfrance
- Objectif Irix 15mm Blackstone/ @irixlens
- Porte filtre Irix + Filtre CPL Irix @irixlens
- Benro ND + GND reverse / @benro_filters
- Mon trépied Benro / @benrofrance
————————————————————#landscapephotography #beautifullandscape #master_gallery #ig_bestshots #colors_of_day #planet_earth_shots #awesomeearth #wonderful_places #longexposureshots #long_exposure #cloudstagram #naturelovers #sunshinecoast
Sympa ce Lémurien qui tape la pose 🙂. Ce petit Sympa ce Lémurien qui tape la pose 🙂.
Ce petit primate vie à l’état sauvage uniquement sur l’île de Madagascar 🇲🇬.
Selon les scientifiques, leurs ancêtres auraient atteint l’île à bord de radeaux naturels 🪵🌊 de végétation dérivants depuis l’Afrique 🇿🇦.———————————🟩——————————
Prise réalisée avec :
- Canon R5 📷 🔴 @canonfrance
- Objectif Canon RF 70-200 F4 L @canonfrance
- Mes yeux 👀 et mon âme d’artiste 🎨
———————————🟩——————————#naturephotography #boissieredudore #wildlifephotography #zoolaboissieredudoré #animalier #loireatlantiquetourisme
Le gélada (Theropithecus gelada) est un primate 🐵endémique des hauts plateaux éthiopiens. Il vit entre 1800 et 4400 mètres d’altitude ⛰️. C’est désormais le seul représentant du genre Theropithecus, autrefois très répandu dans toute l’Afrique 🇿🇦 et jusqu’à l’Inde 🇮🇳. Dans l’ombre des grands singes, le gélada possède une sociabilité complexe et unique.———————————🔻——————————
Prise réalisée avec :
- Canon R5 📷 🔴 @canonfrance
- Objectif Sigma 150-600mm Sport @sigmaphoto
- Mes yeux 👀 et mon âme d’artiste 🎨
———————————🔺——————————#naturephotography #boissieredudore #wildlifephotography #zoolaboissieredudoré #animalier #loireatlantiquetourisme
Le mérite est un lion 🦁 aux dents 🦷 impuiss Le mérite est un lion 🦁 aux dents 🦷 impuissantes.
(Djamal d’Ispahan)———————————🔻——————————
Prise réalisée avec :
- Canon R5 📷 🔴 @canonfrance
- Objectif Sigma 150-600mm Sport @sigmaphoto
- Mes yeux 👀 et mon âme d’artiste 🎨
———————————🔺——————————#naturephotography #boissieredudore #wildlifephotography #zoolaboissieredudoré #animalier #loireatlantiquetourisme
« Le feu 🔥 devient mer 🌊 et de la mer, une « Le feu 🔥 devient mer 🌊 et de la mer, une moitié devient terre, l’autre moitié nuée ardente.»
(Héraclite) - Pose longue (30s)———————————🔻——————————
Prise réalisée avec :
- Canon R5 📷 🔴 @canonfrance
- Trépied Benro travel Angel @benrofrance
- Objectif Sigma 24-35mm Art @sigmaphoto
- Porte filtre et filtre polarisant Irix @irixlens
- Filtre ND et GND Benro @benro_filters
- Mes yeux 👀 et mon âme d’artiste 🎨
———————————🔺——————————#landscape #landscapephotography #dslrphotography #beautifullandscape #longexposure #longexposure_shots #seascape #amazingshot #photographiepaysage #vendée
Le cormoran 🐦 ne peut pas produire de liquide i Le cormoran 🐦 ne peut pas produire de liquide imperméabilisant sur ses plumes 🪶.
Il doit donc se sécher régulièrement pour ne pas prendre trop l’eau 💦 . Il régule la température 🌡️ de son corps et améliore ainsi la digestion 🐟.————————————————————
Faite avec :
- Mon cœur ❤️ & mon regard
- Canon 5Dm4/ @canonfrance
- Objectif Sigma 105mm Macro / @sigmafrance
- Benro ND Filter / @benro_filters
————————————————————#naturephotography #bretagne #wildlifephotography #bzh #animalier
Instagram post 18350010718177626 Instagram post 18350010718177626
La plage de sable rouge près du phare de Mean Ruz La plage de sable rouge près du phare de Mean Ruz | Perros-Guirec l Côtes d’Armor, sur la côte de granit rose. Le sable rouge provient d’un minéral, le grenat 🔴.
📷 Shoot en pose longue de 30 secondes. ⏳
—————————————————————-
Faite avec :
- Mon cœur ❤️ & mon regard
- Canon R5 / @canonfrance
- Objectif Sigma 24-35mm Art / @sigmafrance
- Porte filtre Irix + Filtre CPL Irix
- Benro ND + GND reverse / @benro_filters
- Mon trépied Benro / @benrofrance
—————————————————————-#landscapephotography #beautifullandscape #master_gallery #ig_bestshots #colors_of_day #planet_earth_shots #awesomeearth #wonderful_places #longexposureshots #long_exposure #cloudstagram #naturelovers #sunshinecoast #traveltheworld #bretagne
Suivez-moi sur Instagram
© 2020 Laurent Le Ny. Tous droits réservés.
✕
 
Return to shop